After doing a lot of research I’d come to the conclusion I wanted a quadcopter that was small enough to be fun and fast, but large enough to carry an HD camera for long enough to get some nice footage. I’d watched a bunch of videos by juz70 like this:
and wanted that same out-of-body serene feeling. The Lumenier frames seemed to be really well reviewed with people doing video so I decided to go with them. There’s the QAV250, QAV400 and QAV500 to choose from and the 400 seemed the most appropriate to accomplish my three goals: flippable fun, decent flight times and stable for the camera.
With that decided, I went about building a parts list. This was actually pretty hard since I found I had to go to a lot of different places to find the info I needed but thankfully, I came across this thread where Rob215 was building almost exactly the type of quad I was looking for. He kindly put a parts list in that thread and that got me a really good start.
I certainly didn’t get everything right first time and had to order (and wait… thanks incredibly slow Vancouver mail ;-)) on a few occasions. Here’s the list for the frame only (I’ll detail radio and FPV kit in another post).
Kit List
- QAV400 frame with G10 arms1
- 4x FX2216-9 1100kV motors2
- QAV “Rib” Landing Gear3
- 2x Graupner E-Prop 8×5 and 2x Graupner E-Prop 8x5L Pusher4
- M5 Orange Aluminum Flange Lock Nut (set of 4)5
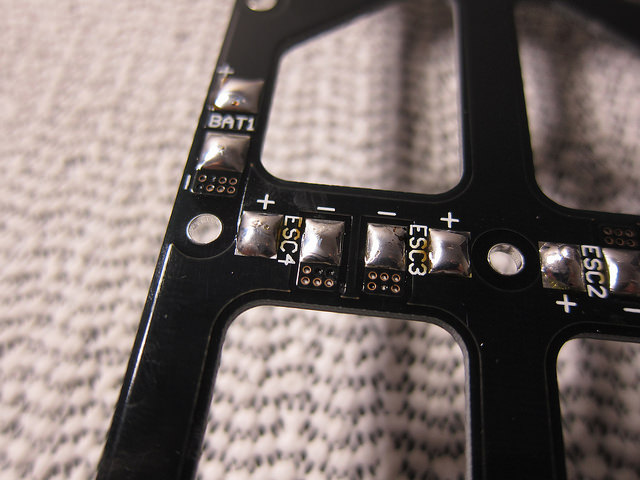
- Lumenier 30 amp ESC with SimonK Firmware6
- XT60 connector pair and 12AWG cable for the battery pigtail
Why Those Parts?
- I chose to go with G10 arms. It seem aluminium vs G10 is a personal choice and there’s not a lot in it. Ultimately I went with G10 for a few reasons: it doesn’t bend (but it does snap so…), it was marginally cheaper and it’s pretty much RF transparent which can’t be a bad thing. One thing worth noting: the aluminium arms are threaded and the G10 ones are not. The G10 arms come with long nut/bolt pairs that go through both sides of the dirty frame which means you don’t have a stable set of arms until you’re done soldering your motor cables. This definitely made it harder to work with but nothing terrible, I just kept dropping the arms off the frame all the time and looking back, I could easily have just spun the nuts on without Loctite and it would have been as easy as the aluminium.
- I still don’t really understand how to go about choosing motors properly. I followed what others had gone with. The research I did do suggested that the lower the kV rating, the slower the motor spins with higher torque and as such is better suited to larger props. Smaller quads use higher kV ratings and smaller props.
- There are a few choices for landing gear. I figured I’d be on the safe side and at least start out with relatively large bendy landing gear. I may well go for smaller more aerodynamic landing gear as I get more confident.
- I’ve built a quad, therefore two props go clockwise, two props go counter-clockwise. Once you’ve got them in your hands and you just spin them around a bit, it’s obvious which one goes which way.
- As mentioned above, two props spin in each direction. It seems the motor manufacturers only provide standard ‘clockwise to tighten’ prop adapters with the motors, so the two motors that spin clockwise are trying to loosen their nuts all the time. You can buy reverse threaded prop-adapters but they cost more than nylon locknuts which the internet seems to believe do the job just as well.
- Why did I get 30A ESCs when the motors I’ve chosen have a max current draw of 18A? Well, always best to have a bit of headroom right?
Tools and Consumables
To build one of these, you’ll need some tools. I think so far I’ve used:
- Allen keys for the frame bolts
- Soldering iron and solder/flux for the ESCs, motor connections and LiPo pigtail
- Multimeter to test my terrible soldering
- Needle-nosed pliers for everything
- Loctite non-permanent threadlocker
- Assorted random things to stand it on
The Build
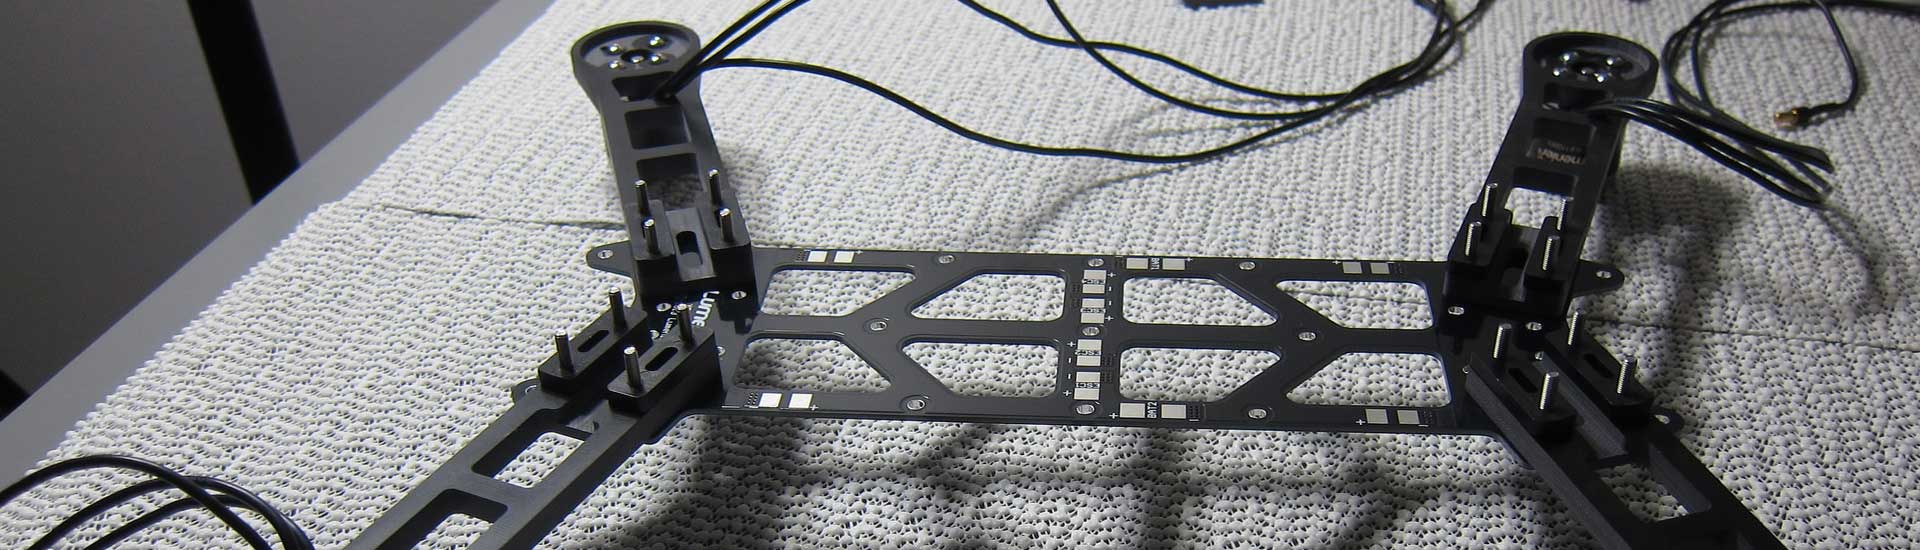
Following the QAV400 Build Manual only got me up to putting on the arms before it went off the rails. As mentioned above, the G10 arms are different and will require you to use longer bolts and spin on the nuts so you can work without them falling off all the time (wish I’d thought of that at the time).
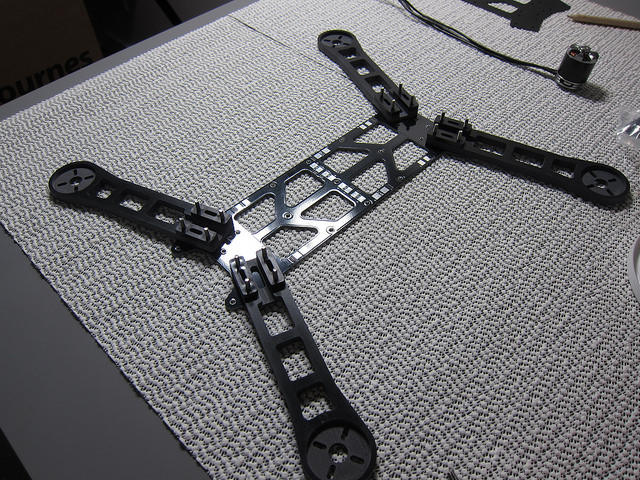
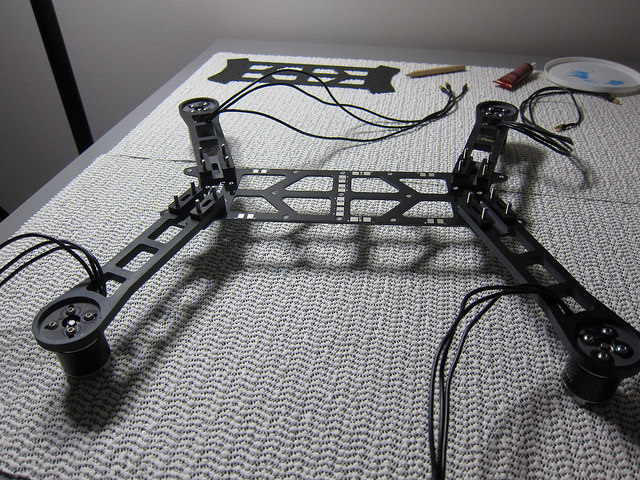
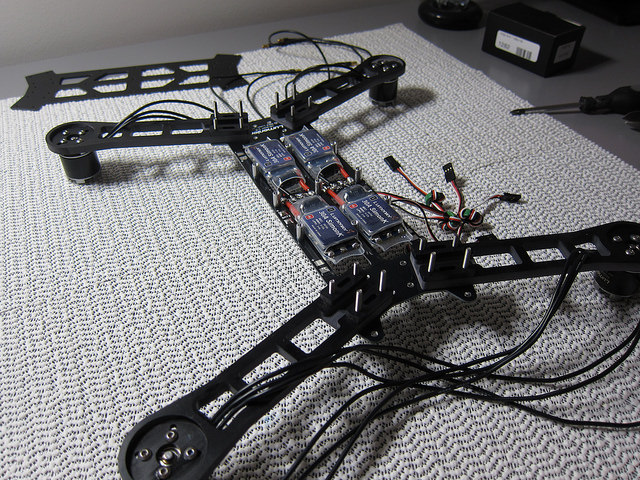
Once the arms were on, I actually found it useful to attach the motors so that I could stand the frame (upside down) on them. It gave some clearance so that I didn’t melt my desk when soldering. Don’t go crazy tightening the screws into the motor, let the Loctite do its job and don’t risk stripping the threads (this goes for all of the assembly).
I’m not sure since I don’t have aluminium arms to compare with, but I think the G10 arms are thinner at the frame end and as such come with spacers. You should be able to see these in the pictures. Don’t forget to put those on…
I learnt a lot about soldering building this quad. My advice: go watch a lot of YouTube video on soldering and practise on something you don’t care about first. I made some nasty mistakes that required a lot of cleanup and could have risked the quad in flight if I hadn’t noticed them (cold solder joints and so on). Make sure your pads are nicely tinned before trying to attach any cables.
Once the ESCs were soldered on, it was time to add the motors. Now as mentioned earlier, two spin clockwise, two counter-clockwise. It would appear there’s no real way to tell which direction they’re gonna spin before soldering one of them up. This seems stoopid to me but hey, apparently that’s how it goes. Check out the second post for details. The picture below is the story so far…
If you have any questions about any aspect of this post, please leave a comment below.
Enjoyed reading the build and looking forward to seeing the rest of it! If you ever need any help with your quadcopter/FPV gear just let me know